How to Shoot Horizontal and Vertical Client Video in One Session
· FlashFilm Academy
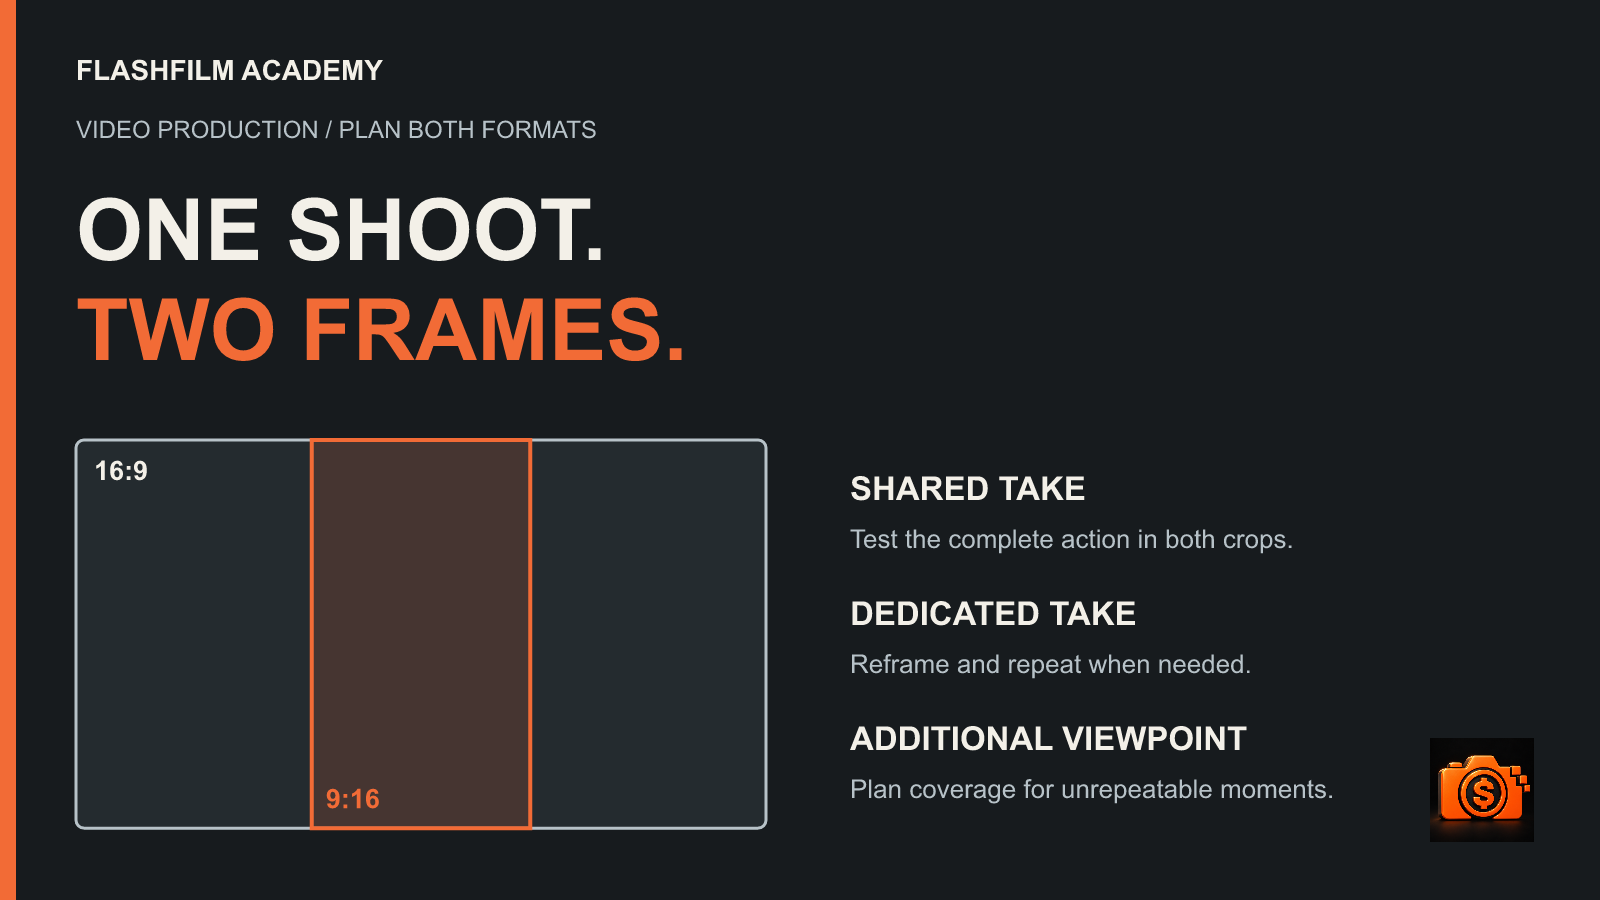
To deliver horizontal and vertical video from one client shoot, agree on both versions before filming, test the actual crops on location, and capture separate takes whenever one composition cannot serve both. Higher-resolution footage can provide room to reframe, but it cannot recover a person, hand movement or product detail that falls outside the usable crop.
This guide is for videographers and photographers adding motion work to a client package. The goal is a workable capture plan for a website film and portrait social clips, with a clear distinction between sharing footage and promising identical edits.
Start with the deliverables, not the camera orientation
Ask where each finished video will appear and what the viewer should do next. A website case study and a short social introduction may need different openings, pacing, titles and calls to action even when they share interview footage.
Write down the aspect ratio, pixel dimensions, duration, number of edits, caption treatment and approval process for each delivery. For example, a fictional package might include one 60-second 1920 × 1080 website film and two 20-second 1080 × 1920 portrait clips. Those are three finished edits; making each one captioned and clean would create six delivery files. These are example specifications, not universal platform requirements.
Check the current destination rules before booking. YouTube currently categorizes square or vertical videos up to three minutes as Shorts for standard-channel uploads made on or after October 15, 2024. A vertical file is therefore more than a rotated website export. See YouTube’s current Shorts eligibility guidance. Other destinations and paid placements need their own checks.
Use our video production brief checklist to settle the message and delivery scope before deciding which shots can be shared.
Understand what a portrait crop removes
Aspect ratio describes width relative to height. A 16:9 frame is wide; a 9:16 frame is tall. Filling a portrait frame with a landscape recording normally removes substantial picture information from the sides unless you use a different layout, such as a smaller full-width image within a designed vertical canvas.
Here is a useful calculation for square-pixel footage without extra stabilization or rotation: a 3840 × 2160 recording contains a full-height 9:16 crop approximately 1215 pixels wide and 2160 pixels tall. That crop can be reduced to 1080 × 1920. It preserves about 31.6 percent of the original width. You still need the important action to fit inside that narrow region throughout the shot.
By comparison, a 1920 × 1080 landscape recording offers only about 608 × 1080 pixels for the same full-height portrait crop. Filling a 1080 × 1920 delivery then requires enlargement. That does not automatically make the result unusable, but it is a reason to test image quality rather than promise it from the recording label alone.
These figures are geometry, not a quality guarantee. Focus, noise, compression, lens performance, stabilization and additional cropping all affect the finished image. Confirm the actual recording dimensions and usable picture area of your chosen mode.
Choose which shots can share a take
A single interview subject with modest movement may work in both formats when the framing is deliberately tested. A wide two-person conversation, a long display table or an action moving across the frame may require another approach.
Review each important shot and choose one of three capture decisions:
- Shared take: the subject and essential action remain readable in both intended crops. Record and inspect a test before committing.
- Dedicated take: repeat the action with a composition designed for the second format. Keep performance, wardrobe and props consistent where continuity matters.
- Additional viewpoint: for an event or action that cannot be repeated, plan another appropriately operated angle when resources, access and safety allow. Include its setup and footage handling in the schedule.
Do not assume that moving the portrait crop back and forth will rescue every wide composition. It may separate people who need to be seen together or create distracting movement. Sometimes a dedicated close-up, a different edit or an agreed graphic layout tells the story more clearly.
Test framing before the client starts performing
Make a short recording in the actual setup. Use framing guides if your equipment provides them, or inspect the test in both delivery canvases before filming the full sequence. Check the entire action, not one flattering still frame.
For an interview, watch the subject’s eyes, headroom, hands and natural leaning. If the person gestures toward an object, both the person and the object must remain understandable. Leave appropriate space for captions and titles in each version, then check a current destination preview. A generic center box is not a universal safe-area specification.
For a product demonstration, test the widest hand movement and the smallest detail the viewer needs to read. Avoid composing so loosely that the horizontal version becomes weak merely to preserve an emergency portrait crop. Choose a separate take when the compromise no longer serves the story.
Add format decisions to the shot list
Give every planned shot an identifier and a visible action. Add its intended versions, capture decision, movement boundary and required detail. A row saying “B-roll, both formats” gives the crew much less direction than “S04: hands place the approved sample on the work surface; shared take if hands and label remain inside both test frames.”
Group related setups so the crew can finish their essential coverage before changing position or lighting. Adobe’s shot-list planning guide explains the value of organizing shots by setup and location. The format-decision fields here are an original Academy planning exercise.
A shot list describes coverage. A call sheet communicates the day’s people, places and timing. Carry the extra takes and setup time into the schedule instead of assuming portrait coverage will happen during an already full filming window.
Work through a fictional workshop example
Imagine a small business commissioning the three edits described earlier. Its owner explains a service, then demonstrates packing a sample order. The approved message is about the process; no sales results or customer claims are being made.
- Interview: test one shared take with the owner seated and the portrait crop visible during review. Record the complete answer and usable pauses for both edits.
- Process wide: capture the workspace for the website film. Mark it horizontal-only if a portrait crop removes the worker or necessary context.
- Detail action: film a separate portrait take of the hands checking the sample label. Use demonstration paperwork without private customer information.
- Closing action: capture a deliberately framed end moment for each format, leaving planned room for its call to action.
Before leaving that setup, review the relevant source clips in both intended frames. If the label disappears during the hand movement, change the framing or repeat the detail while the people, props and lighting are still available. Do not defer a known coverage gap to an automatic editing tool.
Reframe each edit and check the complete export
Build each delivery in its agreed dimensions. Reposition clips deliberately and redesign captions, logos and closing cards for that canvas. A horizontal title may need a shorter line or different placement in portrait, and a crop that works at the start may fail when the subject moves.
Automatic reframing can be a starting point for positioning. Adobe’s Auto Reframe sequence documentation describes creating a sequence at a target aspect ratio and reviewing the result. The capture decision remains yours: reframing cannot restore unrecorded action.
Watch each exported file from beginning to end at a useful viewing size. Check faces, hands, product details, captions, graphics, picture quality and sound. Then inspect the destination preview when available. Confirm the filename, dimensions, duration and caption treatment against the delivery list. Our client video handoff checklist helps organize that final review.
Frequently asked questions
Is recording in 4K enough to deliver horizontal and vertical video?
It can provide useful crop resolution, but it does not guarantee a workable composition or final image. Check the actual source dimensions, required delivery size and movement throughout the clip. Capture a dedicated take when the important action will not fit.
Does an open-gate recording mode solve the problem?
A mode that records a taller sensor area may offer more reframing room than a wide crop, depending on the equipment and settings. It still cannot make every composition suit both formats. Verify the mode’s dimensions, recording limitations and post-production support, then test the intended outputs.
Should every vertical version have the same duration as the website film?
Only if that serves the agreed brief. A portrait social edit may need its own opening, selection of moments and next step. Specify the edit count and duration before the shoot so the production and finishing work are planned.
Prepare your next multi-format shoot
Choose one upcoming sequence and mark every essential shot as shared, dedicated or additional viewpoint. Test the most difficult crop first, then revise the coverage and schedule while changes are still practical.
For a free planning starting point, get the ten Academy Prompt Kits, then choose the kit that fits your client-work task and check its suggestions against the actual brief and location. Create or sign in to an Academy account, opt into Academy marketing emails and confirm your subscription when prompted. No paid membership is required for these free resources; AI-tool access and usage costs are separate. You can unsubscribe anytime. Existing members can open the Prompt Kits space.
For structured production training and community support, explore monthly and annual FlashFilm Academy membership. Bring a short framing test and your delivery list to the community so the discussion starts with the real production constraints.
YOUR NEXT STEP · START FREE
Take one useful step toward a stronger creative business.
Get ten free prompt kits for photographers and videographers. Research buyers, clarify your offer, track hidden work or prepare for shoot day—then check the results against real evidence.
Get the free prompt kitsEnter your email for a free community access invitation and Academy emails. Unsubscribe anytime. Already a member? Open this resource with your existing account.
Build on your first step with structured training and community. Explore Academy membership.
Join the conversation.
Read along, ask a question, or share your experience. Comments are open to active FlashFilm Academy members.
Loading comments…